When you have completed your timetable in TimeTabler , you can export your final schedule to any of the MIS (Management Information Systems) listed below.
All exports are with the full agreement and cooperation of the MIS Supplier concerned, and in many cases we are also Official Partners of the MIS/SIS/Admin-System supplier.
The documentation (which you can read by clicking on the links lower down the page) describes what you have to do, in detail – and it comes in 3 parts:
Export-Doc-1 Preparingyour data for Export(scroll down to Part 1 below)
Export-Doc-2Exportingfrom TimeTabler(scroll down to Part 2 below)
Export-Doc-3Importinginto your MIS system(scroll down to Part 3 below)
Who needs to be present ?
You will need your admin or data manager, who has access to your MIS. You will also want your timetableravailable, so s/he can run TimeTablerand advise on the export steps and resolve any issues.
Can you check or export my timetable for me ?
If you prefer, then our Training Partners, MIST Services, offer 2 services:
(1) a service where the TimeTablerdata is checked and reconciled and ensures all the validations ‘pass’, allowing your timetable to be imported into your MIS (typical price: £75+vat). If this is of interest, please email: mist@mistservices.co.uk or
(2) a fuller service where they will transfer your timetable into your MIS – details here.
My MIS/SIS/Admin-system is not on your list below.
We are happy to link to any third-party system which is happy to import a timetable, so please contact us on the Support Centre with details of your MIS and your contact at the MIS supplier. We can then contact them on your behalf.
HelpMovies:
You may also find the following HelpMovies (on specific areas of exporting) useful:
Part 1 Preparing & entering your data into TimeTabler (before you come to export):
For most (but not all) exports, you want the names of your Staff, Subjects, Rooms, etc., to be the same in TimeTabler as in your MIS. For almost all exports, you can schedule using different names if you wish to, and only match when you come to export (so you can schedule in TimeTabler calling a teacher ‘CJo’ even if in your MIS he is called ‘CJOHNS’) … but it usually saves time at the end if you make sensible choices while you are entering your data into TimeTabler, from the start.
So we suggest that you use this documentwhile you are preparing & entering your data into TimeTabler:Export-Doc-1 : Preparing for Export (400kB).
This document also explains about 2-stage (double) importing, which can be a big advantage to you and to your office colleagues.
Any questions; just ask us on the Support Centre.
Part 2 Exporting from TimeTabler, step by step (general advice):
Different MIS admin systems have different procedures, but they fall into 5 main types.
Click on the appropriate link belowto download the correct documentation:
For Others – follow the on-screen instructions or individual documentation.
Older systems:
For Pearson-Fronter (Phoenix) Gold, click here.
For Nova-T4, click here (80kB).
Part 3 Importing into your MIS (MIS-Specific information & advice):
Information about the import to your specific MIS appears below.
In many cases the document is a PDF file; just click on the link to view or download the file.
There is often also advice on trouble-shooting and understanding any problems or error messages.
Please scroll down to find your MIS, then click on ‘Click for documentation‘. (If you can’t see your MIS below, let us know via our Support Centre).
This document: – outlines the import stages in SIMS .net (but you should also read your SIMS documentation)
– describes how to do a 2-stage (double) import – explains how to trouble-shoot if the export is not successful,- explains the error messages that you may see.
.
Local Support Teams: You may also consider involving your local/county SIMS Support Team.They should be familiar with the SIMS Import ‘Wizard’ that is used, because it is exactly the same one that is used by T6. To gain their support it may be important to emphasise this fact.
2
SIMS-Nova-T4
+ Click for documentation
(This export is used by very few schools now). To see the pros/cons of an export to Nova-T4, compared with the direct export to SIMS .net, click here. For details of this export click here for the PDF(80kB, it is the same document as in part 2 above).
Note that Nova-T6 does not allow this direct import; instead you use the modern SIMS.net import described above. There was no Nova-T5.
If you are using the (newer) Cloud School / Progresso MIS then see the previous item … but if you are still using the (older) Facility MIS there are 3 ways to import to it. One way is to do it manually (using the documentation we provide), or there are the chargeable managed services provided by MIST Services Ltd, or by Advanced Learning.
Full detailsof the managed services are given when you follow this link, which also gives you step-by-step documentation on how to do the transfer yourself, manually.
Any problems; consult this trouble-shooting guide or ask us. The Guide’s Appendices contain some useful iSAMS-specific hints.
To import into iSAMS:
This link downloads a document on Importing into iSAMS (3.6MB) provided by iSAMS.
Please also ask iSAMS for a copy of the latest ‘iSAMS Timetable Manager User Guide‘.
Ed:gen: You can also export your timetable to IRIS Ed:gen.
Follow the same steps as above, but at the start, choose ‘Export to -> Ed:gen’ rather than ‘-> iSAMS’.
Click to download the Export document (700kB).
This document:
– outlines the import stages in Pearson/Fronter e1 (but you should also read your Pearson/Fronter documentation or contact the Pearson/Fronter HelpDesk),
– explains how to trouble-shoot if the export is not successful.
And here is a document on importing to e1(900kB) provided by Pearson/Fronter.
We are official (Arbor, previously RM/SESL)-IntegrisPartners.
There are two possible exports:
1 Classic (original version; no longer used as of 2021, but if you need it for any reason, let us know) . This link downloads the documentation supplied by RM (200kB). And this link downloads a document on trouble-shooting (130kB) the export from TimeTabler. And this link gives additional notes specific to RM Integris Classic.
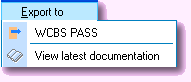
There are 3 possibilities here : ‘PASS 2008 and earlier‘ (the original import), ‘PASS 2009 and later‘ (with an improved import), and ‘HUBmis‘ (the latest).
All these options are available as exports in TimeTabler, and are available as imports in PASS/HUBmis. The preferred method (as of 2019) is now ‘HUBmis‘.
Also, in Year one, you may wish to import your Basic Data into TimeTablerfrom PASS. This document, provided by WCBS, describes how to export Basic Data (Teachers, Subjects, Rooms) from PASS, ready to import into TimeTabler.
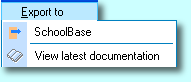
To import into SchoolBase (SchoolBase documentation):
To import into SchoolBase, please read the SchoolBase TimeTabler document – but note that the instructions are out-of-date in that they refer to a CSV file when the export is TXT (and the format is slightly different from stated); please contact SchoolBase for the latest instructions
… and/or watch the video in this SchoolBase Webinar in the SchoolBase Support Portal.
Note: these details may change from time to time, so please contact SchoolBase for the latest documentation on the import.
TimeTabler documentation: Go to ‘Export to -> Rediker‘ and follow the on-screen instructions.
Rediker documentation: For instructions on how to perform the Import into Rediker, please click here.
(Please check with Rediker that this is the latest documentation on their import).
Trouble-shooting guide: This link downloadsa documenton trouble-shooting (130kB) the export from TimeTabler.
We provide an export to School2000. Please contact School2000 for the latest documentation on the import.
This link downloadsa documenton trouble-shooting (130kB) the export from TimeTabler.
We provide an export to Pupil*Asset. Please contact Horizons/Pupil*Asset for the latest documentation on the import. This link downloadsa document on trouble-shooting (130kB) the export from TimeTabler.
We provide an export to I.E.S. Please contact I.E.S. for the latest documentation on the import.
This link downloadsa documenton trouble-shooting (130kB) the export from TimeTabler.
We provide an export to Denbigh. Please contact Denbigh for the latest documentation on the import.
This link downloadsa documenton trouble-shooting (130kB) the export from TimeTabler.
We provide an export to Room Booking System. Please contact Room Booking System for the latest documentation on the import.
This link downloadsa document on trouble-shooting (130kB) the export from TimeTabler.
We provide an export to ScholarPack, but in 2022 ScholarPack say: “We removed our timetabling module … a school can contact their ScholarPack account manager … to discuss options“. Therefore if you wish to have your timetable in ScholarPack, please contact ScholarPack.
We provide an export to Schoolbacs (now under Plus4).
Please contact Schoolbacs for the latest documentation on the import.
This link downloadsa document on trouble-shooting (130kB) the export from TimeTabler.
We provide an export to WebEIM. Please contact Teledata / WebEIM for the latest documentation on the import.
This link downloadsa document on trouble-shooting (130kB) the export from TimeTabler.
Please contact Sleuth (School Software Company) for the latest documentation on the import.
This link downloadsa document on trouble-shooting (130kB) the export from TimeTabler.
Our documentation on exporting to Ed-admin is here: how to export (Note: the export produces an Excel (xls) file; if your copy of Ed-admin wants a different format, just let us know).
Ed-admin’s documentation on the import is here: Ed-admin import document … but please contact Ed-admin to check if they have later documentation.
We provide an export to Edumate. Please contact Edumate for their latest documentation on the import.
This link downloadsa documenton trouble-shooting (130kB) the export from TimeTabler.
We provide an export to MySchool. Please contact MySchool for their latest documentation on the import.
This link downloadsa documenton trouble-shooting (130kB) the export from TimeTabler.
We provide an export to Tribal. Please contact Tribal Education for the latest documentation on the import.
This link downloadsa document on trouble-shooting (130kB) the export from TimeTabler.
We provide an export to OnTheButton. Please contact OnTheButton (Genkior) for the latest documentation on the import.
This link downloadsa document on trouble-shooting (130kB) the export from TimeTabler.
We provide an export from TimeTabler to Sentral. The export file is a CSV file with 9 fields, which you can then import into Sentral.
Please contact Sentral for the latest documentation on their import.
We provide an export to SmartClass. Please contact SmartClass for the latest documentation on the import.
This link downloads a document on trouble-shooting (130kB) the export from TimeTabler.
We provide an export to ISCT. Please contact ISCT for the latest documentation on the import.
This link downloads a document on trouble-shooting (130kB) the export from TimeTabler.
Choose ‘Export to -> Classter’ and follow the on-screen instructions. Please contact Classter for the latest documentation on their import.
This link downloads a document on trouble-shooting (130kB) the export from TimeTabler.
Choose ‘Export to -> Diyar’ and follow the on-screen instructions.
Please contact Diyar for the latest documentation on their import. This link downloads a document on trouble-shooting (130kB) the export from TimeTabler.
Our documentation on exporting to PCSchool / FACTS School Management is here: PCSchool export-import document.
It includes advice from PCSchool / FACTS on how to import from TimeTabler.
To export to SchoolPal, choose ‘Export to -> SchoolPal’ (near the end of the list) and follow the on-screen instructions to create an Excel file that SchoolPal will import. Note: A couple of the advertised steps aren’t needed by SchoolPal, so you’ll find it skips them. At the end, you will have the Excel file, which you may then need to edit / find-&-replace to get the group labels as SchoolPal wants them. Then import into SchoolPal.
Any questions, contact our Support Centre.
To export to Satchel, choose ‘Export to -> Satchel’ (near the end of the list) and follow the on-screen instructions to create an XML file that Satchel will import.
Instructions from Satchel on how to perform this export, appear here: Satchel import documentation.
Any questions, contact our Support Centre.
The Compass import requires 5 (or 6**) files. To create them: – 1) In TimeTabler, go to ‘Export to -> Compass‘: this creates the 5 files for you (Faculties.csv, Locations.csv, Subjects. csv, Classes.csv, Timetable.csv) – 2) ** If you use Options, you may also want to create a Student File in Options(Enrolments.csv).
Then take these 5 (or 6) files and import them into Compass.
Any questions, contact our Support Centre.
To export to Go 4 Schools (GO4Schools), choose ‘Export to -> Go 4 Schools’ (near the end of the list) and follow the on-screen instructions to create an XML file that Go 4 Schools will import.
Import instructions from Go 4 Schools will be available soon; in the meantime, please ask their helpline. Any questions, contact our Support Centre.
This method is suitable only if you still have the old DOS version of Star.
Otherwise, please use the export to SIMS.net at the top of this page.
50
Customized file
You can create your own custom export file, and choose what data it contains.
See Section L in the TimeTablerManual.
51
Options
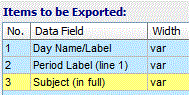
To export your timetable to Options,
see Section 7 in the Options Handbook.
52
StaffCover To export your timetable to StaffCover,
see Section C in the StaffCover Handbook.
53
Outlook Export a calendar of staff timetables to MicrosoftOutlook.
See the help files and KnowledgeBase article for details.
Any Questions ?
If you have any queries about the Export, please contact the TimeTabler HelpLine.
If you have any queries about the Import,please contact the HelpDesk for your MIS.
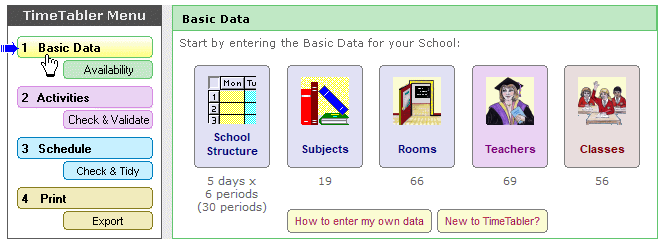
This shows the Main Menu, and Step 1 : the Basic Data screen, with five big buttons.
Each button leads you to an entry screen.
To enter your data you would start at the left, and work your way across to the right.
Look how straightforward it is, compared to other programs !
And the fully-illustrated printed Manual explains each step, in detail.
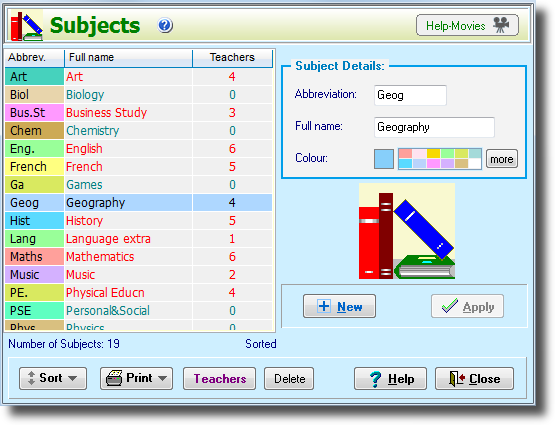
Subjects Screen
This is the screen for saying which Subjectsyou will want to timetable.
You can return here at any time to edit / alter your data.
You can give each Subject a colour – this helps during scheduling, and for the printouts.
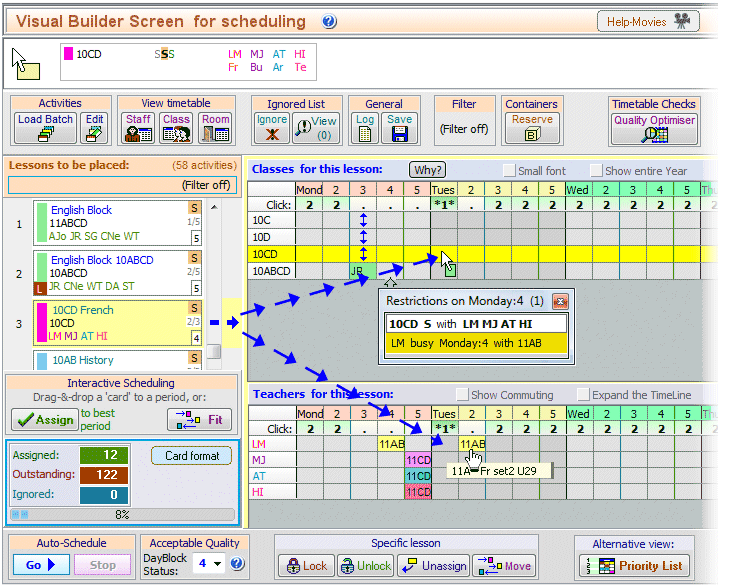
Visual Builder Screen
This is the main screen on which you do the actual scheduling.
You can sit at this Visual Builder Screen and drag-and-drop to ‘drive’ through the timetable. At first sight it looks very complicated. To see what each part will do for you, please click on: www.timetabler.com/kb/UsingtheVisualBuilderScreen.pdf
Class Timetable Screen
This shows you the Class Timetables, so you can see the pattern while you are scheduling lessons.
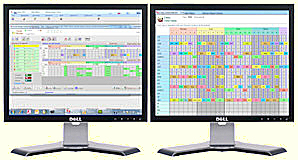
There are similar screens for the Staff Timetables and for the Room Timetables. If you use dual monitors you can see these more easily and spread them out over the bigger area.
All the buttons, and the symbols, are explained when you click on the button.
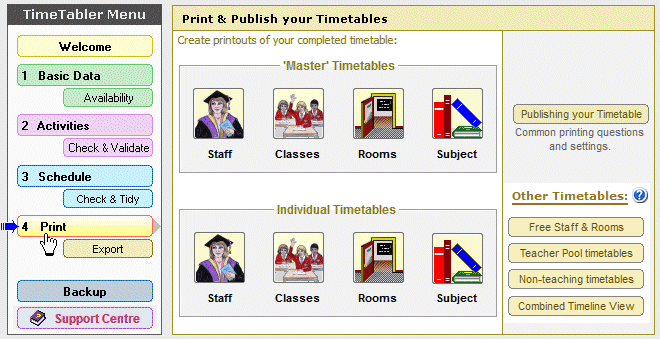
The Printout Menu
This shows you some of the possibilities for the Printouts.
Within each of these, there are millions of ways of fine-tuning the exact design of the Printouts.
They can be printed on paper, or produced as web-pages, at the click of a button.
A professional result.
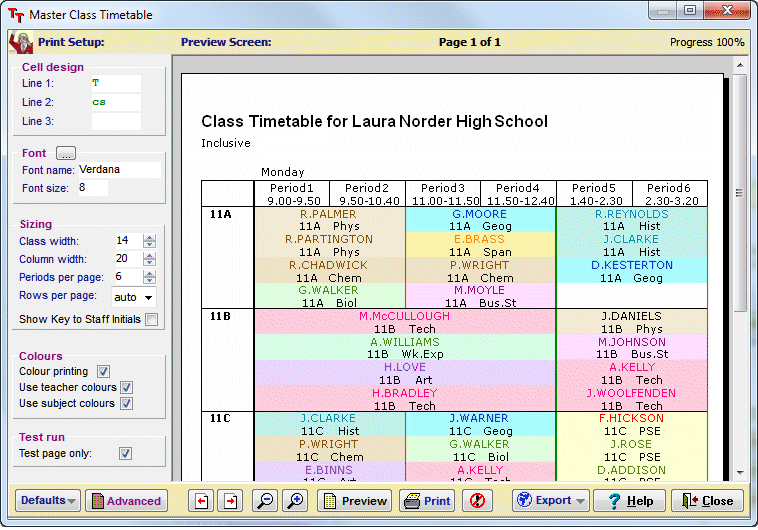
The 'master' Class Printout Screen
This shows you the Preview Screen , so you can design the ‘master’ Class printout, before printing it.
There are similar screens for the Staff Timetables and for the Room Timetables. You have total control over the design, the font and the colour, the column widths, the labels, etc, etc. All the buttons and the controls, are explained when you click on the button.


 button.